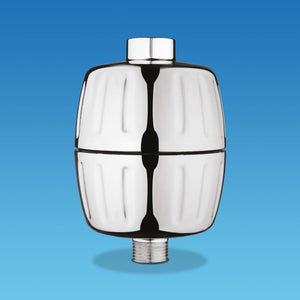
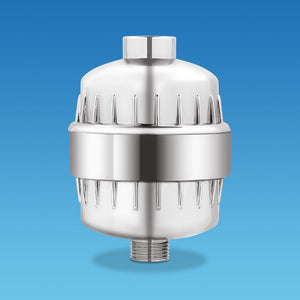
A good shower filter can be a game changer for your skin, hair, and complexion. Unfiltered tap water is loaded with chemicals that clog your pores and dry your skin, but you can vastly improve the quality of your water with a good showerhead water filter. The trick is actually choosing the best shower filter for your home.
At AquaBliss, we’re here to make it easy. We offer several of the best shower heads for hard water, each one designed to improve your showering experience.
Our filters remove some of the most common particles and additives while infusing the water with healthy minerals to benefit your hair, skin, and nails. Wondering how to install a shower filter? These filters don’t negatively impact your water pressure, and best of all, they’re simple to install.
If you want the absolute best shower filter, the following are our premium, top-of-the-line models:
- AquaBliss HD Revitalizing Shower Filter - This cutting-edge filter is infused with beneficial vitamins and minerals. It’s our best shower filter for beauty and revitalization, and it’s perfect for anyone looking to maintain healthy, radiant skin. Each filter cartridge is good for up to 6 months.
- AquaBliss HD Multi-Stage Shower Filter - This is our most powerful multi-stage shower filter for good reason. It’s loaded with the highest concentration of healthy minerals like activated carbon, and it eliminates the greatest number of contaminants—including VOCs, pesticides, and pharmaceuticals. It’s perfect for environments with excessive hard water, and each filter cartridge is good for a full 6 months. If you want the best shower head for hard water, look no further.
Though the options above represent our most advanced showerheads, we have even more shower filter options to choose from depending on your personal needs. Each one is guaranteed to improve your water quality.
Wondering how to install a shower filter? You don’t have to be a plumbing pro. By following these steps, you can have your own filter installed in minutes.

How to Easily Install the Best Shower Filter
Learn the simple steps to effortlessly install the top-rated shower filter for a refreshing and healthier bathing experience.
- Rinse Your New Shower Filter
- Remove the Existing Shower Head From Your Shower
- Clean Your Shower Arm
- Attach Your Shower Filter
- Attach Your Shower Head
- Replace Your Filter at Least Once Every 6 Months

1. Rinse Your New Shower Filter
Remove your shower filter from its packaging and place it under a stream of warm water. Let the water flush through the filter for 60 seconds. Then flip it over and allow the water to run in the opposite direction. This is an important step to remove any carbon dust that may have built up within the filter.

2. Remove the Existing Shower Head From Your Shower
Twist your existing shower head counter-clockwise to loosen and remove it from the shower arm. If you have a specialty shower head or mount that doesn’t simply twist loose, you may need to consult the showerhead documentation for information on how to remove it.
If the shower head is just stuck or has been installed too tightly to easily twist, you may need to use a pair of pliers or a wrench to loosen the head.

3. Clean Your Shower Arm
Scrub your shower arm threads to remove any mildew, soap scum, dirt, or other bacteria. One easy way to do this is to use a wired brush or steel wool along with a 1:1 mixture of water and white vinegar. Once you’ve finished cleaning the threads, wrap two to three layers of plumbers’ tape around the threads.

4. Attach Your Shower Filter
Place the provided washer into its connector along the top of the shower filter. Then screw the filter into the shower arm by turning it clockwise until it fits snugly. All water will now feed directly into the filter through the shower arm.

5. Attach Your Shower Head
Finally, attach your shower head or mount it to the end of the filter and turn it clockwise to tighten it. Continue turning until you achieve a snug fit. The best shower filter is now ready to go to work for you.

6. Replace Your Filter at Least Once Every 6 Months
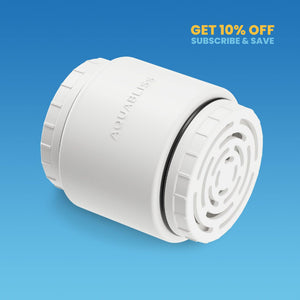
Every AquaBliss shower water filter for hard water includes a pre-installed cartridge, so you don’t need to buy anything extra to get started.
However, the filter cartridge does need to be replaced at least once every 6 months (even the best shower head for hard water needs occasional maintenance, right?).
The good news is that these filter cartridges are easy to replace.
- Remove the shower head or mount by twisting it counter-clockwise
- Remove the shower filter by twisting it counter-clockwise
- Open the shower filter and remove your old cartridge
- Insert the replacement cartridge with the mesh facing up (toward the shower arm)
- Close the shower filter and reattach it to the shower arm
- Run the shower for at least 1 minute to flush out any carbon dust
- Reattach the shower head
Don’t Make Compromises When Searching for the Best Shower Filter
If you truly want the best shower head for hard water, we invite you to discover the AquaBliss difference for yourself, including how to install shower head filter. Not only are our shower filters incredibly easy to install, but they’re designed for uncompromising quality.
The universal adapter means that they work seamlessly with almost any shower, and the no-leak seals ensure a smooth flow of water without disruption.
Most important of all, the filtration is unrivaled. Each cartridge is equipped with a sand filter to block large sediments like limescale, micro-porous PPC cotton to block small sediments like dust, and ultra-fine stainless-steel mesh to block medium-sized sediments.
These filters reduce chlorine, scale, trihalomethanes, VOCs, and a wide range of other impurities.
We’re so confident that this is the best shower filter you’ve ever owned that we offer a 100% satisfaction guarantee.
So don’t settle for just any shower water filter for hard water. Explore the full range of premium AquaBliss filters, and install them with ease!


